

You can identify pin 1 on a connector by looking for special markings such as arrows, dots, or colored wires. Correct pin 1 identification keeps your electronic assemblies safe and reliable. If you connect a cable incorrectly, you might face issues like:
Electrical shorts or open circuits that damage components
Functional failure when signals go to the wrong pins
Costly rework or even scrapping of boards
YLS custom ribbon cables always provide clear pin 1 markings to make installation easy. With a few simple tips, you will feel confident finding pin 1 on any connector.
Key Takeaways
Look for visual cues like dots, arrows, or colored stripes to identify pin 1 on connectors.
Always check the datasheet for your component to confirm the location of pin 1 before making connections.
Use YLS custom ribbon cables, which clearly mark pin 1 with a red stripe, to simplify your installations.
Double-check pin 1 markings and alignment before connecting to avoid damaging your electronic components.
If pin 1 markings are unclear, use a magnifier or contact the manufacturer for assistance.
Visual Cues for Pin 1 Identification
Common Pin 1 Markings (Arrows, Dots, Numbers)
You can spot pin 1 marking on most connectors by looking for specific visual indicators. Manufacturers use several methods to help you identify pin 1 quickly and accurately. Here are the most common ways you will see pin 1 marked:
A small dot by pin 1 shows you exactly where to start your connection.
The outline of the component may have an angled or chamfered corner near pin 1.
A triangle or arrow points directly to pin 1, making it easy to find.
A notch or tab on the connector body often places pin 1 at the bottom left when the notch is on the left.
A square or rectangle drawn around pin 1 highlights its location.
The number “1” is printed close to the pin 1 pad for fast pin numbering.
You should always check for these pin 1 marking cues before making any connections. These markings help you avoid mistakes and keep your electronic projects safe.
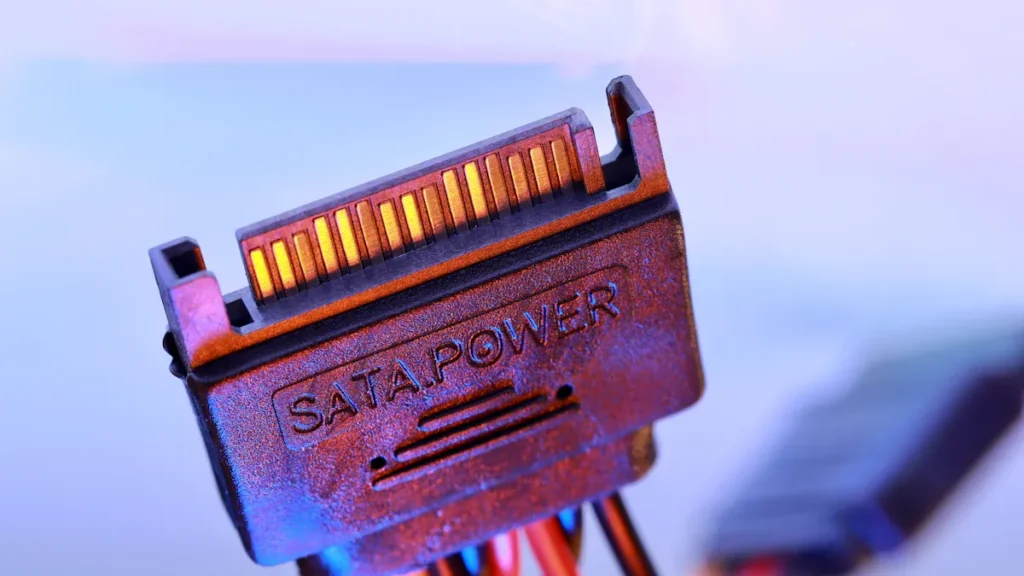
Color Codes and Notches on Ribbon Cables
Ribbon cables use color codes and notches to make finding pin 1 simple. You will often see a colored stripe running along one edge of the cable.
One edge of the ribbon cable is typically marked with a red stripe, which indicates that this edge is connected to pin 1 on the connector.
The striped edge of the cable is conventionally connected to pin 1, helping to prevent reversed connections.
Some ribbon cables also have a notch or key on the connector. This notch ensures the cable fits only one way, so you cannot connect it backward. Always match the red stripe or the notched edge with the pin 1 marking on your connector.
YLS Custom Ribbon Cable Pin 1 Features
YLS custom ribbon cables make pin 1 identification clear and reliable. You will notice these pin 1 marking features on every YLS cable:
The red wire on the ribbon cable always indicates pin 1.
This method follows industry standards for ribbon cable design.
YLS uses these visual cues to help you connect cables correctly every time. You can trust that each YLS custom ribbon cable provides easy-to-see pin 1 marking, which reduces errors and saves time during installation.
Step-by-Step Pin 1 Identification by Connector Type
Integrated Circuits and Sockets
You can identify pin 1 on integrated circuits and sockets by checking for specific pin 1 marking features. Follow these steps to ensure correct component orientation:
Look for a notch or scallop on the chip. Place the notch on the left; pin 1 sits at the bottom left.
Find a beveled edge at the bottom or left side. Position the chip so the beveled edge is on the left or bottom; pin 1 is at the lower-left corner.
Spot a dimple or dot on the top of the chip. When the dimple is on the left, pin 1 is at the lower left.
Check for a strip or marking on the left side. Pin 1 is at the bottom left.
Read the text on the chip. When the text is upright, pin 1 is at the lower left.
For QFN packages, look for a notch or chamfer in the exposed pad corner. That marks pin 1.
For BGA packages, a small circle marks pin 1.
Always confirm pin 1 identification with the datasheet for your component.
Tip: Always double-check pin 1 marking before inserting an IC. Incorrect orientation can damage your board.
Ribbon Cable Connectors (Including YLS Products)
Ribbon cable connectors use clear pin 1 marking to help you avoid mistakes. YLS custom ribbon cables make finding pin 1 simple and reliable. Here is how you can identify pin 1 on ribbon cable connectors:
Look for a colored stripe, usually red, running along one edge of the cable. This stripe marks pin 1.
Match the red stripe with the pin 1 marking on the connector or header.
Some connectors have a notch or key. Align the cable so the notched edge matches the connector’s pin 1 marking.
YLS cables always use a red wire for pin 1, following industry standards for pin 1 identification.
Before connecting, check the datasheet or product label for confirmation.
Note: YLS custom ribbon cables provide easy-to-see pin 1 marking, reducing errors during installation.
PCB Headers and Board Connectors
PCB headers and board connectors often use visual pin 1 marking to guide you. You can identify pin 1 by following these steps:
Look for a dot, square pad, or number “1” printed near the header. This marks pin 1.
Check for a notch or chamfer on the connector body. Pin 1 is usually next to the notch.
Some connectors use a different colored pad or silkscreen box to highlight pin 1.
Always match the pin 1 marking on the cable with the marking on the board connector.
Use the manufacturer’s datasheet to confirm pin 1 identification if you are unsure.
Always look for orientation marks on ICs and connectors. A dot or notch shows pin 1. Incorrect placement can break your electronic components.
Circular and Rectangular Connectors
Circular and rectangular connectors use unique pin 1 marking methods. You can identify pin 1 by checking these features:
Connector Type | Pin 1 Marking Method | How to Identify Pin 1 |
|---|---|---|
Circular Connector | Small arrow, dot, or number “1” | Find the marking near the first pin position |
Rectangular Connector | Notch, chamfer, or printed “1” | Locate the marking at one end or corner |
For circular connectors, look for a small arrow or dot near the first pin. Pin 1 sits at this position.
For rectangular connectors, find a notch or chamfer at one corner. Pin 1 is next to this feature.
Printed numbers or silkscreen boxes also help you identify pin 1.
Always check the datasheet for confirmation before connecting.
Tip: Manufacturer markings and datasheets provide the most reliable pin 1 identification. Never guess the pin 1 marking.
By following these steps for each connector type, you can confidently identify pin 1 and ensure safe, reliable connections in your electronic projects.
Pin 1 Marking Standards and Datasheet Use
Industry Pin 1 Marking Conventions
You will see that pin 1 marking follows strict industry conventions. These standards help you identify pin 1 quickly and avoid mistakes during component orientation. Manufacturers use several visual cues to make pin 1 identification easy.
Pin 1 marking acts as a reference point for correct placement. When you align pin 1 with the PCB marking, you reduce errors and improve installation accuracy.
Here are the most common conventions for pin 1 marking:
Designers often use a dot or a line on the silkscreen layer of the circuit board to show pin 1.
Pin headers may have a square outline around pin 1.
The pad for pin 1 usually has a different shape, such as square, while other pads are round.
Chips often show pin 1 with a notch, a dot, or the position of the lettering.
Pins are numbered counter-clockwise starting from pin 1.
Manufacturers also use fiducial marks and arrows to indicate pin 1 on connectors. These indicators are crucial for correct connections, especially when working with crimp connector housings. You must pay attention because pin 1 indicators may not always align with the connector’s physical layout.
Pin 1 Indicators | Description |
|---|---|
Fiducial Marks | Used to indicate pin 1 on connectors for correct orientation. |
Arrows | Specific indicators that show the location of pin 1. |
How to Confirm Pin 1 with Datasheets
You can always confirm pin 1 marking by checking the datasheet for your connector or component. Datasheets provide detailed drawings and descriptions that show exactly where pin 1 sits. This step ensures you avoid errors in identification.
Tip: Always use the datasheet before making connections. This habit helps you verify pin 1 marking and prevents costly mistakes.
Here is how you can use datasheets to identify pin 1:
Find the connector type and look for the pin layout diagram.
Check for labels such as “circuit 1” or “pin one” in the drawings.
Match the physical pin 1 marking on your connector with the datasheet description.
Connector Type | Example Datasheet Link | Pin 1 Location Description |
|---|---|---|
JST XA series | Shows ‘circuit 1’ location in datasheet | |
CW Industries CSC10S-ND | CSC10S-ND Specs | References pin one in drawings |
You should always rely on datasheets for final confirmation. This practice ensures that your pin 1 marking matches the manufacturer’s intent and keeps your connections safe and reliable.
Troubleshooting Pin 1 Identification Issues
Missing or Ambiguous Markings
You may sometimes encounter a connector or component with missing or unclear pin 1 marking. This situation can make identification challenging and increase the risk of incorrect component orientation. Here are practical steps you can take:
Check both the silkscreen and assembly documentation for any polarity or pin 1 indicators. These markings often help you identify pin 1.
Use a USB microscope or handheld magnifier to inspect faded or tiny markings on integrated circuits.
Clean the surface of the IC or connector with isopropyl alcohol. This step can reveal hidden pin 1 marking.
Compare the pin count and package type with the datasheet. The datasheet usually provides clear identification for pin 1.
If you still cannot find pin 1 marking, reach out to the manufacturer or supplier for guidance.
Tip: Always verify pin 1 marking before making a connection. This habit helps prevent costly mistakes and keeps your electronic assemblies safe.
Double-Checking Before Connecting
Before you connect any cable or component, double-check pin 1 marking to ensure proper alignment. Follow these steps for reliable identification:
Look for any labels or markings on the module that indicate pin 1 orientation.
Refer to the manufacturer’s manual if the module lacks clear pin 1 marking.
Power off the case before making any connections to avoid short circuits.
Align the red stripe on the ribbon cable with the pin 1 marking on both the busboard and the module.
If you feel resistance while plugging in the connector, check the alignment of the pins to avoid bending or misalignment.
Confirm that keyed headers are assembled correctly to prevent incorrect orientation.
Inspect cables for damage or incorrect assembly, especially with multi-pin connectors. Replace any faulty cables.
Note: If you have questions about pin 1 identification or need support, you can contact YLS for expert assistance.
Method | Details |
|---|---|
Phone | +86 137 36386818 |
inquiry@ylscable.com |
By following these troubleshooting steps, you can confidently identify pin 1 and ensure safe, reliable connections in your projects.
You can identify pin 1 by looking for visual cues like colored stripes, notches, or printed numbers. Always use datasheets and follow industry standards to confirm pin 1 marking. YLS custom ribbon cables make pin 1 identification easy with clear markings. Before connecting, use this checklist:
Check the connector for pin 1 marking.
Match the cable to the connector as shown in the manual.
Avoid forcing the cable into place.
Remember, careful pin 1 identification protects your devices and ensures reliable connections.
FAQ
How do you identify pin 1 on a ribbon cable?
You can find pin 1 by looking for a colored stripe, usually red, along one edge of the cable. This stripe marks pin 1 and helps you connect the cable correctly.
What should you do if pin 1 marking is missing?
You should check the datasheet for your connector or cable. Look for diagrams or notes that show pin 1. If you still cannot find it, contact the manufacturer for help.
Why is pin 1 identification important?
Pin 1 identification prevents wiring mistakes. You protect your devices from damage and ensure signals reach the correct pins. Accurate connections keep your electronics working safely.
Does YLS provide clear pin 1 marking on custom ribbon cables?
Yes, YLS always marks pin 1 with a red stripe on custom ribbon cables. This feature makes installation easy and reduces errors. You can trust YLS for reliable pin 1 identification.
